Fluttering Inspiration: What Are Some Good Butterfly Card Ideas?

Ideas and Inspiration

Handmade Butterfly Cards for Spring & Summer

Aren’t butterflies just the most delightful creatures? They flutter and flit about all spring and summer, bringing a sense of joy and wonder to the garden. We can capture that same wonder and joy at our crafting tables with butterfly cards! 

At Wendy Crafts, I believe in the power of creativity to uplift and inspire, and what better way to express that than through the delicate beauty of butterflies? It warms my heart to share some ideas for bringing their beauty to life in your butterfly cards. 

Whether you’re just starting out or you’re a seasoned creator, there’s something for everyone in the world of butterfly cardmaking ideas.

A closeup of the finished Cricut butterflies.

Discovering Delightful Butterfly Card Ideas

Just as spotting a butterfly in nature can brighten your day, creating a butterfly card can bring a spark of happiness to both the maker and the receiver. There are so many wonderful ways to capture their playful, ethereal essence on paper, from the simplest of designs to more intricate creations. 

Let’s explore some ideas that might just inspire your next butterfly card making adventure!

Simple & Elegant Butterfly Card Ideas

Sometimes, the most beautiful things are the easiest to create. When time is short or you simply prefer a clean and classic look, these simple cards with butterflies are just perfect:

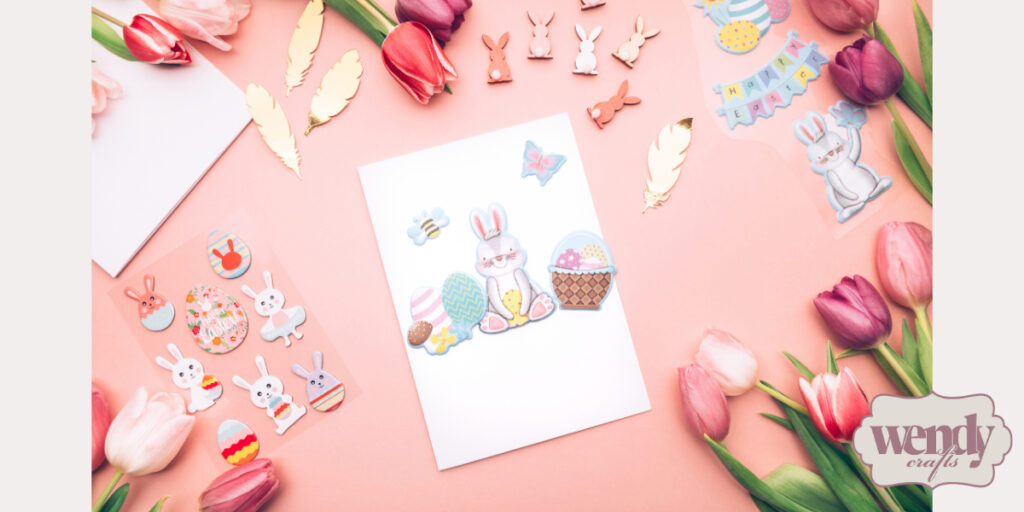
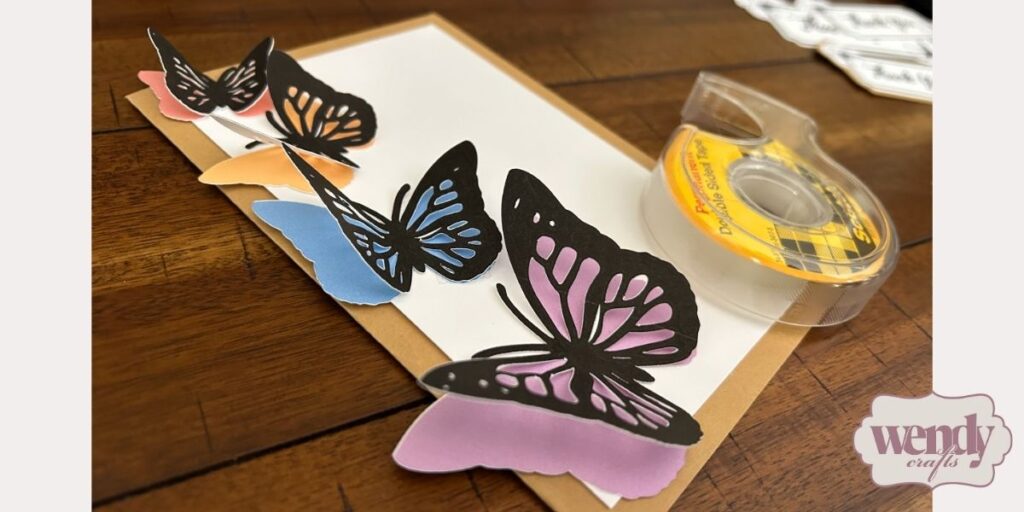
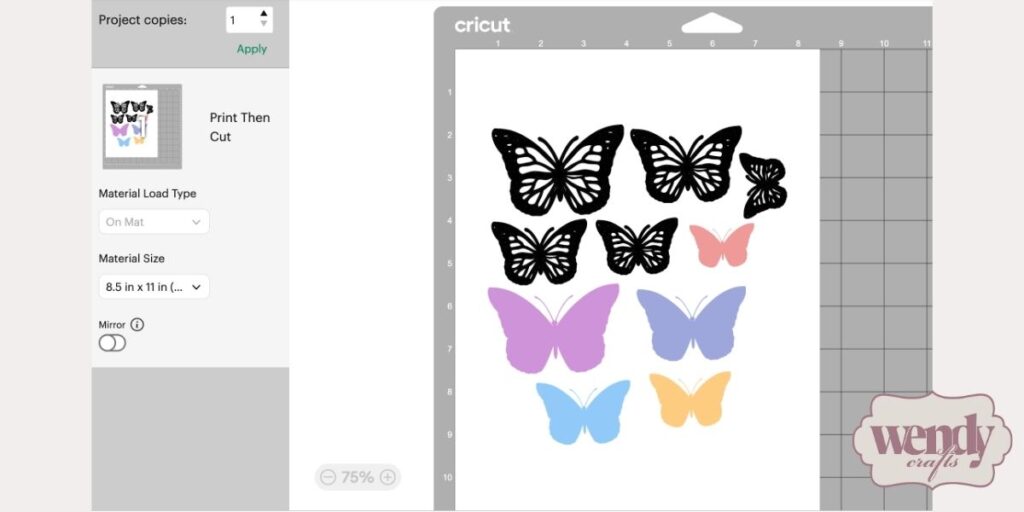
  • The Beauty of Pre-Cuts: You can find pre-cut butterflies in a delightful array of papers and even as sweet little stickers. Just imagine layering a few delicate paper butterflies in soft pastel hues onto a crisp white cardstock—instant elegance! 
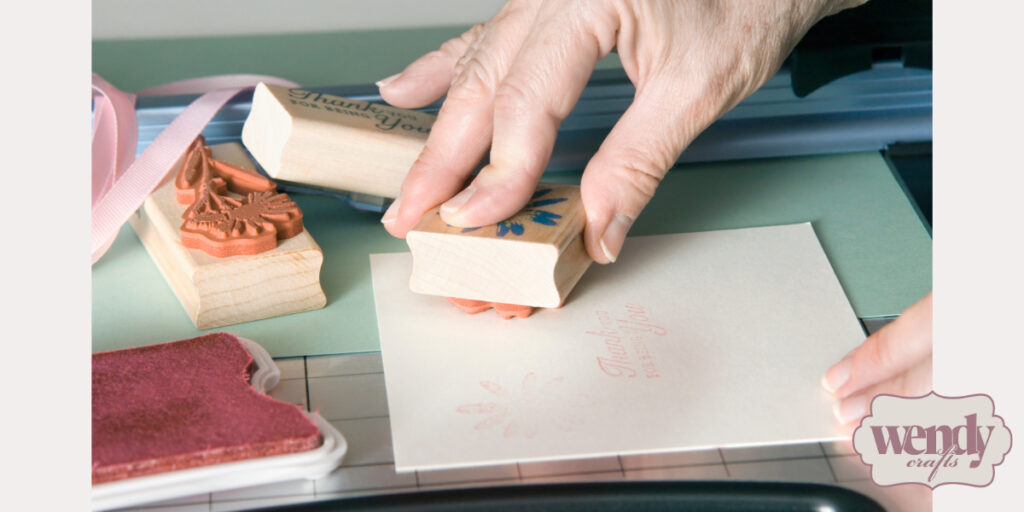
  • The Magic of a Simple Stamp: There’s something so charming about a simple butterfly outline or silhouette stamped onto a card. You can use your favorite inks—perhaps a soft gray for a touch of understated beauty or a vibrant color to really make it pop! It’s a lovely way to create sophisticated, minimalist butterfly greeting card ideas that still carry a heartfelt message.
  • Washi Tape Wonders: Washi tape is like a little ribbon of possibility! Butterfly-themed washi tape can add such a whimsical touch to your cards. You can create borders and butterfly trails or even use them to outline a butterfly shape. It’s a fun and easy way to add a bit of flair to your butterfly card-making.
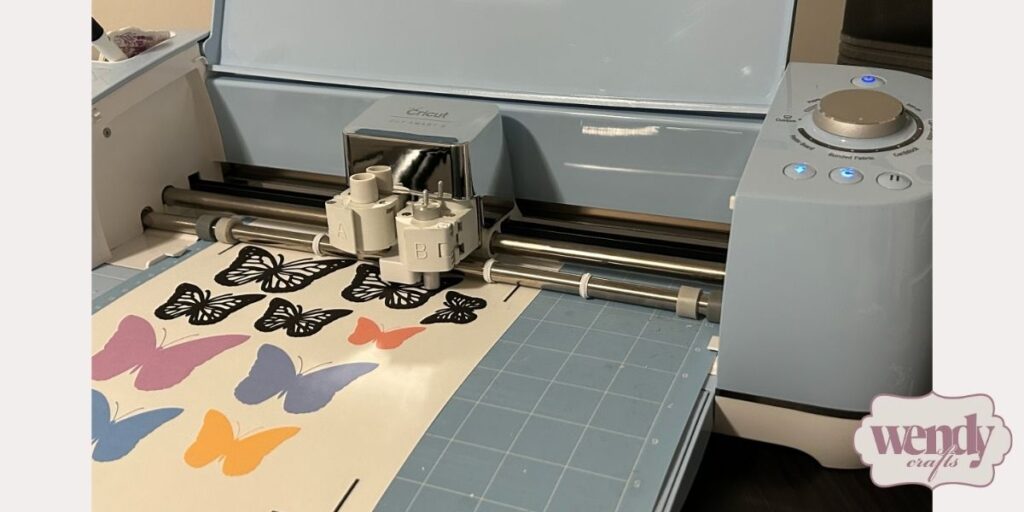
  • Keeping it Minimalist: Sometimes, a single, perfectly placed butterfly is all you need. Imagine a beautifully die-cut butterfly in a contrasting color on a simple cardstock. It speaks volumes without being fussy. These minimalist butterfly greeting card ideas are often the most impactful.
Computer screenshot of the Cricut butterfly designs that will be used for the butterfly card.

Exploring Handmade Butterfly Cards

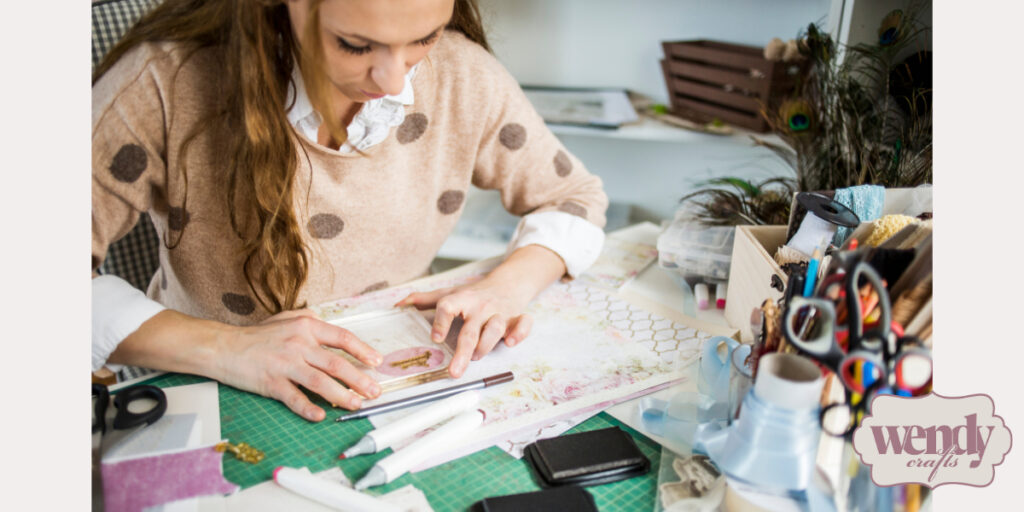
For those of us who find joy in the process of creating something unique with our own hands, handmade butterfly cards offer a rewarding crafting experience. Here are some other ways to explore butterfly card making:

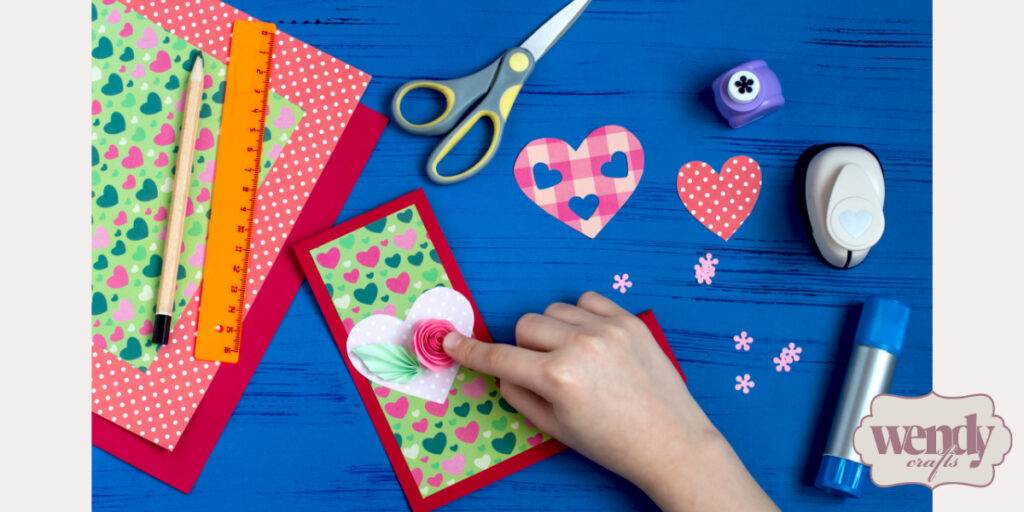
  • The Art of Paper Piecing: Paper piecing is like putting together a little puzzle of paper to create a layered design. Butterfly wings are just perfect for this! You can choose different patterned papers or coordinating solids for each section of the wing, building up a dimensional butterfly. It adds a lovely texture and depth to your cards with butterflies.
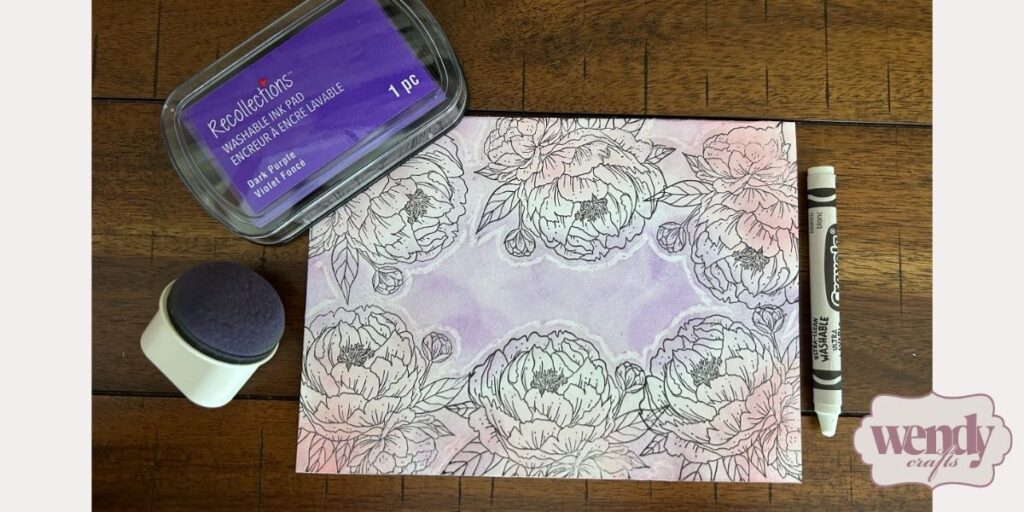
  • Bringing Butterflies to Life with Color: Don’t be afraid to get your hands inky or paint-splattered! Coloring your stamped or die-cut butterflies with markers, watercolors, or even colored pencils can bring them to life in a beautiful way. Adding a little shading along the edges can give them dimension and make them feel like they’re about to take flight on your handmade cards.
  • Adding a Little Sparkle and Shine: Who doesn’t love a bit of sparkle? A touch of glitter on butterfly wings can catch the light so beautifully! And tiny gems or pearls added along the body or wing details can give your butterfly card a touch of elegance. 
Circuit machine cutting butterfly designs.

Unique Butterfly Card Ideas for Special Occasions

Butterflies seem to carry a message of hope and joy, making them perfect for many different occasions. Here are some butterfly card ideas tailored for those special moments:

  • Celebrating Birthdays with Fluttering Fun: For birthdays, let’s make things bright and cheerful! Imagine a cascade of vibrant butterfly die-cuts fluttering across the card front, maybe even layered with some fun birthday greetings. It’s a wonderful way to create a celebratory greeting card.
  • Offering Comfort with Gentle Wings: In times of sorrow, a delicate butterfly can symbolize hope and transformation. Soft, muted colors and a single, gracefully placed butterfly on a sympathy card can convey a sense of peace and comfort in a handmade card.
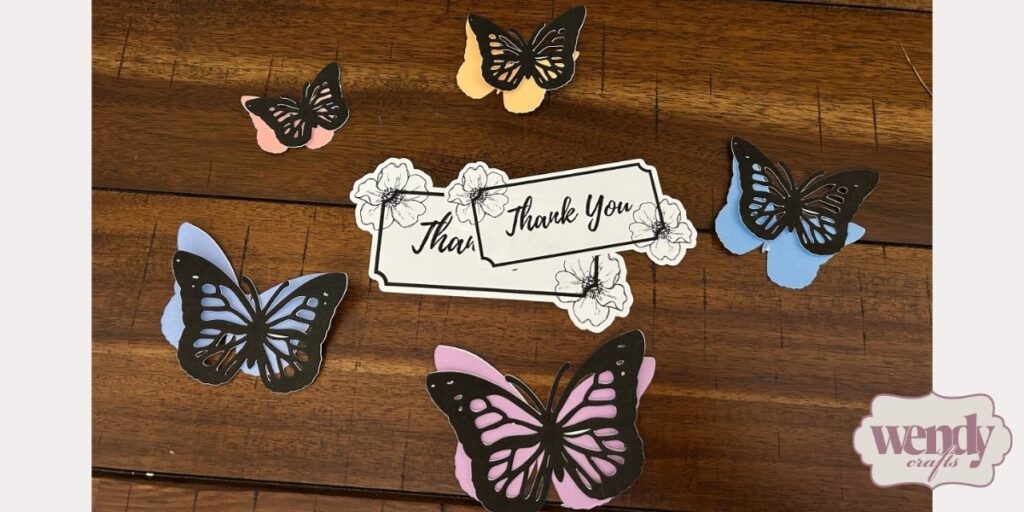
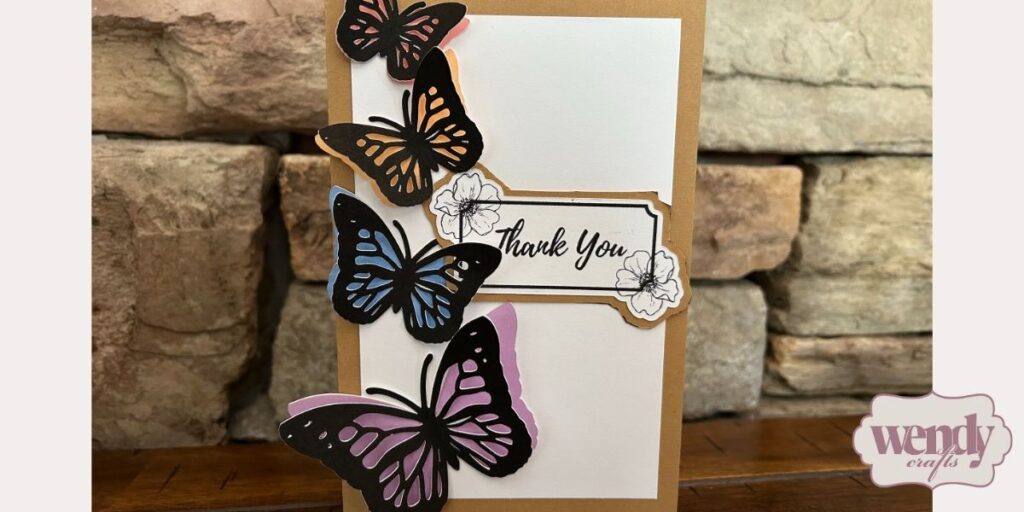
  • Expressing Gratitude with Graceful Accents: For thank you cards, a subtle butterfly detail can add a touch of elegance. Placing a small butterfly die-cut tucked into a corner or a delicate stamp near your message is a lovely way to create a refined butterfly card.
  • Sending Uplifting Thoughts with Fluttering Friends: A thinking of you card with cheerful colors and an uplifting butterfly design can bring a little bit of sunshine to someone’s day. The recipient will love seeing a few butterflies seemingly taking flight across your handmade card.
  • Welcoming New Life with Sweet Butterflies: For baby shower cards, sweet and gentle butterflies in pastel shades are just adorable. You could pair them with other baby-themed elements for a truly precious butterfly card idea.

The Magic of Butterfly Pop-Up Cards

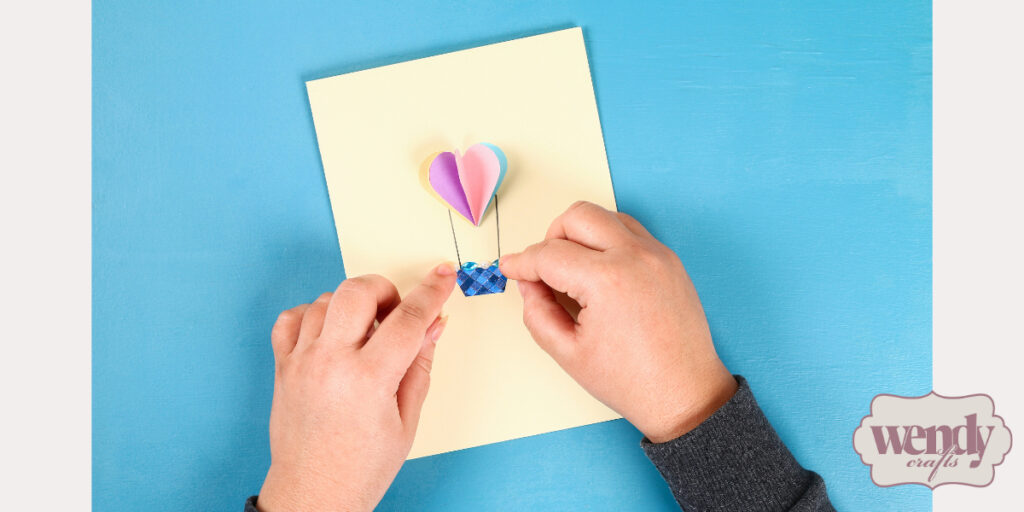
Butterfly pop-up cards are a most delightful surprise! When the recipient opens the card and a beautiful butterfly seems to flutter to life, it sends a message of joy.

The clever mechanics behind a butterfly pop-up card are fascinating! There are so many ingenious ways to make those beautiful wings seem to flutter to life. Some of the simpler methods involve carefully folding the butterfly’s wings and then attaching its little body to a center panel that gently rises when the card is opened. 

Then there are the more intricate designs, which can create a dynamic fluttering motion—almost as if a real butterfly has landed right on the card! Creating pop-up cards might seem intimidating at first, but don’t let that deter you! It’s a fun and rewarding technique to learn, and the surprise it brings to the recipient is priceless!

Finished Cricut butterfly designs and Thank You inscription designs.

Incorporating Different Materials in Your Butterfly Cards

Don’t limit yourself to just paper! There’s a whole world of card making supplies and materials that can add such a unique and personal touch to your butterfly cards.

  • The Ethereal Beauty of Vellum: With its translucent quality, vellum is just perfect for creating delicate butterfly wings. Layering vellum over colored cardstock creates a beautiful, almost stained-glass effect on your handmade butterfly cards.
  • Adding Texture with Fabric Scraps: Using fabric scraps or embroidery to create a butterfly adds a lovely tactile element to your cards. Imagine a butterfly made of soft felt or delicate lace! Details like these add wonderful dimension to your butterfly cards.
  • Bringing in Nature with Dried Elements: For a truly unique touch, consider incorporating dried flowers and leaves around your butterfly designs. It creates a beautiful, natural feel to your butterfly greeting card.
Attaching the Cricut butterflies to the card base.

Tips for Stunning Butterfly Card Making

Through my own crafting journey, I’ve discovered that the little details can truly elevate a project. To make your butterfly cards truly shine, here are a few little tips I’ve learned along the way.

Play With Color 

Don’t be afraid to experiment with different color combinations! Think about how the colors make you feel—bright and cheerful, or soft and serene? Let your emotions guide your choices for your handmade butterfly cards.

Consider Size and Placement

The size and where you place your butterflies on the card can make a big difference. A single large butterfly can be a beautiful focal point, or a scattering of smaller ones can create a sense of movement on your butterfly card.

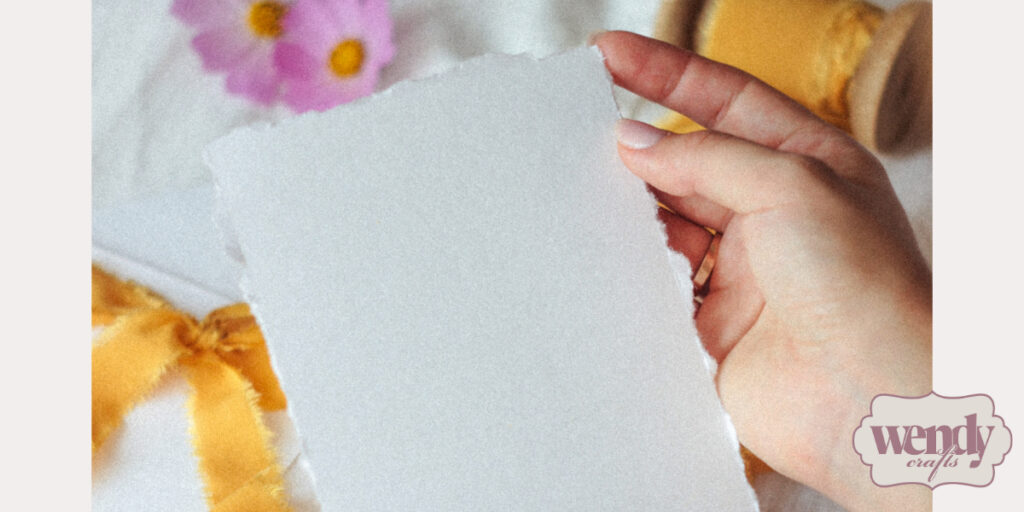
Good Cardstock is Crucial

Using a good quality cardstock as your base makes a difference in how your finished card looks and feels. It provides a sturdy foundation for all your lovely butterfly creations.

Make Sure Everything is Clean and Precise

Taking a little extra time to ensure your cuts are clean and your gluing is neat will impact the quality of your butterfly card-making. Precision makes your cards look more professional. 

The finished butterfly card made as a Thank You card.

Start Making Your Fluttering Creations!

From the simplest stamped butterflies to the delightful surprise of a butterfly pop-up card, there are many wonderful ways to capture the beauty and symbolism of these amazing creatures in your paper creations. There’s such joy in giving and receiving a thoughtful butterfly greeting card, a little handmade piece of happiness.

Have fun and let your creativity take flight! 

At Wendy Crafts, I genuinely believe in the power of crafting and how it can offer healing, build community, and spread joy. Be sure to check out the rest of my website for more handmade card and paper craft ideas!

Homemade Cards: How to Make Cards Yourself

How To

Creating A Personal Touch in the Digital Age

You know how we’re all just bombarded with emails and texts these days? Well, isn’t there just something extra special about holding something real in your hands, something someone actually made

That’s how I feel about homemade cards. It’s not just a piece of paper. It’s like a little piece of someone’s heart—a thoughtful “thinking of you” says so much about the person who made it and the person who received it.  

Here at Wendy Crafts, I truly believe that getting creative can bring us closer, help us feel better, and just make us plain happy. And that’s why I’m so excited to share the fun of making your own cards with you!

Homemade card cutting tools and tape.

The Dawn of a Crafting Hobby

My own crafting adventure began with a simple love for paper and the magic of telling stories, something I carried over from my background in journalism. There’s something so satisfying about sitting down to work with different kinds of crafting materials, especially when you’re creating something beautiful like a scrapbook page or a homemade card. 

Discovering the exquisite designs of Anna Griffin was a real turning point for me, and when I finally got my Cricut Maker, well, my imagination just took flight!

Hobby? More Like Taking Over My Life (and House, But In a Good Way!)

For me, crafting isn’t just something I do; it’s a part of who I am. It’s how I let my feelings out, how I find a little bit of calm in the day, and how I connect with all of you lovely people. That little snip of the scissors, the gentle thump of a stamp—the whole creative process brings me a peaceful happiness.  

What started as a little spark of interest has definitely grown into a full-blown crafting hobby that has, shall we say, enthusiastically taken over a good portion of my life and my house! But honestly, I wouldn’t trade it for the world. 

I love the feeling of starting with a blank page and letting the inspiration guide me. Whether it’s a color I saw in a magazine, a pattern on a pretty dress, or the beauty of the leaves outside my window, there’s always something to spark an idea. The absolute best part is sharing those creations with others and seeing the joy they bring. 

I believe everyone has a little bit of creativity tucked away inside them, just waiting to be discovered. It’s not about being perfect; it’s about enjoying the process, expressing yourself in your own unique way, and finding that little spark of joy. So, I encourage you to grab some paper, gather a few simple tools, and give this crafting hobby a try. 

Cardstock, a paper cutting tool, and a corner punch tool for homemade cards.

My Simple Guide to Making Homemade Cards

Making your own cards is absolutely doable, and it’s incredibly fulfilling. Cardmaking allows you to infuse your unique touch into each creation, making the person who receives it feel truly special and seen. 

I’ll show you how easy it is to learn how to start crafting your own cards. No fancy secrets, just the steps I use myself! So, whether you’ve been crafting for ages or thinking, “Hey, that card-making thing sounds kind of fun,” this guide is for you! 

Let’s get started together!

An assortment of papers and embellishments for homemade cards.

1. Pick The Perfect Paper For Your Homemade Cards

The first thing you’ll want to think about is your paper. After all, it’s the canvas for your creativity, right? There are just oodles and oodles of choices, each with its own unique charm. 

As you’re evaluating your paper options, here are a few things to keep in mind:

  • Cardstock Weight: For the base of your card, you’ll want something with a bit of substance, so the finished card feels nice and sturdy in your hand. To give your homemade cards a professional feel, look for cardstock that’s around 80lb to 110lb.
  • Color and Pattern: The color and pattern of your paper really set the mood for your card. Solid colors are elegant and timeless, while patterned papers can add a fun pop of personality. At the same time, don’t be shy about mixing and matching!
  • Texture: Have you noticed how different papers feel to the touch? Some are smooth as silk, while others have a lovely texture like linen or little raised designs. Texture can add such a delightful visual and tactile element to your cards.
  • Size: There are a few standard sizes for cards, like the A2 (folds to about 4.25 x 5.5 inches), the A6 (folding to around 4.5 x 6.25 inches), and the good old A7 (for 5×7 inch cards). Pick a size that feels right for your design and the message you want to share.

When you’re just starting out, it’s a good idea to have a little collection of different colored cardstock and some pretty patterned papers. That way, you’ll have plenty of options to play with!

A collection of tools and materials for making homemade cards.

2. Gather Your Essential Crafting Tools

When learning how to craft your cards, you’ll need a few little helpers—your tools! But you don’t need to spend a fortune, especially when you’re just dipping your toes in. Here are the basics I couldn’t live without:

  • Paper Trimmer or Scissors: A good paper trimmer will give you those nice, clean, straight edges that make your cards look polished. But if you don’t have a paper trimmer, some sharp scissors will do the trick.
  • Scoring Tool and Bone Folder: Scoring is like magic! It’s just creating a little crease line before you fold your cardstock. This makes sure you get a nice, crisp fold instead of a bumpy one. 
  • Adhesive: You’ll need something to hold all your lovely layers together. Double-sided tape is a wonderful starting point—it’s nice and secure and not too messy. You can also experiment with glue dots, liquid glue (just use it sparingly!), and foam tape if you want to add a little bit of dimension.
  • Embellishments (Optional): This is where you can really let your personality sparkle! Think ribbons, buttons, sweet little stickers, die-cut shapes, sparkly gems, and maybe some stamps. Start with a few things that catch your eye, and as your crafting skills grow, so will your collection! 
Simple "love you to the moon and back" inscriptions and moon and heart images.

3. Start Simple with Your Card Designs

When you’re just learning how to make cards, the best approach is to keep it sweet and simple. You don’t need to create the Mona Lisa of cards right away! Focus on clean layouts, a good balance of elements, and placing things where they look just right. 

Here are a few easy design ideas to get your imagination going:

  • Layered Paper: Cut out different shapes or panels of those pretty patterned or colored papers you chose and layer them on your card base using adhesive. This is a great way to use up little scraps and add some lovely visual interest.
  • Focal Point: Pick one main thing you want people to look at—maybe a stamped flower, a cute die-cut shape, or a pretty sticker—and build your design around it. Keep the rest of your card simple to let your main image or element be the star of the show!
  • Simple Sentiments: You can find the sweetest pre-made sentiment stickers or stamps to add your greeting. Or a heartfelt, handwritten message makes a lovely touch.
  • Adding Texture: Don’t forget texture! A little piece of ribbon, some embroidery, twine, or even paper with a raised design adds an irresistible tactile element to your cards.

The most important thing is to enjoy the process and create something that comes from the heart. Don’t put pressure on yourself for perfection when you’re just starting out on this fun crafting adventure.

Assorted paper, stamps, stickers, and cardstock for homemade cards.

4. Personalize Your Homemade Cards

Now, this is where the real magic happens! The beauty of homemade cards is that there are countless ways to make them personal. Take a moment to think about who you’re making the card for and add touches that reflect their personality and your relationship. 

You can add personalization to your cards by doing any of the following:

  • Choosing Colors They Love: If you know their favorite color, try to incorporate it into your design to show you’re really thinking of them.
  • Using Themes Relevant to Them: Do they adore gardening? Maybe add some little floral elements. Are they big fans of a certain animal? See if you can find a cute sticker or die-cut.
  • Handwriting Messages: A handwritten message to the person shows you’ve taken the time to put your thoughts and feelings down on paper.
  • Referencing Inside Jokes or Shared Memories: If it feels right, a little nod to a funny memory you share can make the card extra special.

These personal touches are what make homemade cards so meaningful and treasured. My greatest joy comes from knowing that my creations can make someone feel seen, valued, appreciated, and loved—personalization is a big part of that.

Finished mixed media homemade card with moon and heart images.

Want More Wendy Crafts? Come Join My Community of Creativity!

Learning how to make cards is just the doorway to a whole world of creative fun! I hope this has sparked a bit of creative curiosity in you and maybe even inspired you to gather some paper and give it a go. Remember, it’s not about perfection; it’s about the joy of creating and the connection you make when you share something handmade. 

At Wendy Crafts, I wish to build a warm and welcoming community where we can all share our love of crafting and support each other on our creative journeys. I believe in the wonderful, healing power of creativity and the joy of sharing what we make. 

For more creative ideas and updates on the Wendy Crafts journey, follow me on social media!

What Are the Best Cardmaking Supplies for Homemade Cards?

Craft Supplies

Handmade cards are an expression of care and creativity—they’re little pieces of art crafted just for your loved ones! But to create those memorable cards, you need the right materials. 

At Wendy Crafts, I’ve dedicated years to exploring and mastering the art of cardmaking, and I’m here to share my passion with you. I’ll share my favorite picks for the best cardmaking supplies, from paper types to embellishments to tools. With the right supplies, you can transform a simple DIY card into a beautiful keepsake that will be treasured for years to come.

An assortment of the best cardmaking supplies for making colorful spring or Easter cards with bunnies, eggs, and baskets.

Best Paper for Homemade Cards

The quality of your handmade cards heavily relies on the paper you choose. Selecting the right cardstock and specialty papers can elevate your designs from simple to stunning. 

What is Cardstock?

Cardstock is the foundation of most handmade cards. It’s thicker than regular paper and provides the necessary sturdiness and durability needed for a card. 

Understanding the different types and weights of cardstock is crucial for getting those professional-looking results. Popular types of cardstock include:

  • Smooth Cardstock: Ideal for stamping and printing, offering a clean, crisp surface. This type is perfect for detailed images and intricate designs.
  • Textured Cardstock: Adds visual interest and tactile appeal, perfect for backgrounds and layering. Embossed or linen textured cardstock can elevate simple designs.
  • Glitter Cardstock: Adds sparkle and glamour, great for festive cards. Ensure the glitter is adhered well to avoid shedding.
  • Metallic Cardstock: Adds a sheen, perfect for elegant designs. Brushed metallic or mirror finish cardstock can create stunning effects.
Closeup of a woman's hand holding a sheet of white specialty paper that has been torn along the edges

Weights and Their Uses:

Think of cardstock like fabric—it’s not just about how it looks, but how thick and sturdy it feels. Choosing the best paper for homemade cards often depends on your specific project, so you’ll need to consider the purpose of the card and the desired effect. 

  • 65lb Cardstock: A good option for layering and die cutting. It is a lighter-weight cardstock that will add dimension without adding a lot of bulk.
  • 80lb Cardstock: Excellent for layering and die-cutting, providing flexibility without being too flimsy. It’s versatile and easy to work with.
  • 110lb Cardstock: Ideal for card bases, offering a sturdy foundation. This weight ensures your cards stand upright and maintain their shape.

Essential Cardmaking Supplies

Specialty Papers

Beyond cardstock, specialty papers open up a world of creative possibilities. These papers can add unique textures, visual effects, and a touch of elegance to your handmade cards. Some of the most popular specialty papers for cardmaking include:

Vellum

Vellum is a translucent paper that brings a soft, elegant, and ethereal quality to cardmaking. Its delicate appearance makes it perfect for creating overlays, adding depth, and softening harsh lines. Vellum can be used to create “windows,” layers for photos, or subtle background elements. 

An overhead view of a child's hand putting together a heart-themed card using colorful patterned paper, heart-shaped cutouts, and floral embellishments.

Patterned Paper

With patterned paper, you get fantastic designs right at your fingertips, making cardmaking way easier and instantly adding that “wow” factor. Use patterned paper for backgrounds, borders, or as focal points with eye-catching designs. For a consistent aesthetic, match your pattern selections to the card’s theme and color coordination.

Handmade Paper

There’s something really special about using handmade paper to give cards a lovely, natural feel with different textures and fibers. You can find handmade papers through local artisan shops or online specialty retailers. Handmade paper is ideal for rustic or nature-themed cards when used as a card base or as accent pieces. 

Where to Buy Cardstock and Paper

Whether you’re a beginner or an experienced crafter, knowing where to find quality materials can make all the difference. There are a lot of places to find what you need—from big online shops to your friendly neighborhood craft store and even little specialty shops that have the really cool stuff! 

Some of my favorite supply spots are:

  • Online Retailers: Amazon, Scrapbook.com, and other online stores offer a wide selection of cardmaking supplies at competitive prices. Online retailers often have sales and discounts that make it easy to stock up on items.
  • Local Craft Stores: Michaels, Jo-Ann Fabrics, and similar stores provide hands-on access to various papers. I love being able to see and feel the paper before purchasing.
  • Specialty Paper Stores: These shops often carry unique and high-quality papers for specific projects. They may also offer expert advice for choosing the right paper for your cards.

If you want your cardmaking ideas to come to life, you’ve got to have the right tools and materials. Beyond cardstock and paper, a card crafting arsenal includes a variety of adhesives, cutting tools, and embellishments. These are the kinds of supplies that make your crafting flow smoother and really bump up the quality of your handmade cards. 

  • Adhesives: Glue sticks, liquid glue, and tape runners.
  • Cutting tools: Scissors, paper trimmers, craft knives, and cutting mats.
  • Embellishments: Stickers, gems, glitter, ribbons, twine, washi tape, stamps, and ink pads.
Closeup of a woman's hand using an ink stamps to create designs on a handmade card.

Creative Cardmaking Ideas

Getting creative with cardmaking means trying out all sorts of techniques and finding themes that spark your interest. Whether you’re a beginner or an experienced crafter, there’s always something new to discover. 

Let’s dive into some creative cardmaking ideas that will inspire your next project and help you craft memorable handmade cards. 

DIY Card Ideas for Beginners

For those new to cardmaking, starting with simple techniques builds confidence and creativity. Simple layering is a great way to begin, using different cardstock colors and patterns to create depth and visual interest. Focus on coordinating colors and patterns to ensure a harmonious design. 

The stamping technique is another excellent idea for beginners that allows you to create focal points and backgrounds easily. Consider masking techniques by covering part of your card or designs to create layered stamped images for a more intricate look. 

Die-cutting machines are also beginner-friendly, enabling you to create intricate shapes and designs effortlessly. If you emboss the cut-outs, they create this amazing raised texture that makes your cards look really professional. If you’re looking for simple projects with just a few supplies, Wendy Crafts has tutorials on handmade and homemade cards to get you started. 

Overhead view of a woman attaching folded paper hearts and a basket to cardstock to create a 3-D hot air balloon.

Advanced Cardmaking Techniques

As you become more comfortable with cardmaking, exploring advanced techniques can unlock new creative possibilities. Watercoloring adds vibrant colors and unique effects to your cards—use watercolor paper for the best results. 

If you want to make your cards really pop, try mixed media techniques. Use fabric, buttons, wood cutouts, or whatever else catches your eye—it’ll give your cards a totally unique look and feel. 

Pop-up cards create designs with elements that pop up when opened, offering a delightful surprise for the recipient. There are special pop-up dies and templates that make the whole process a breeze for making impressive, eye-catching cards. 

Homemade Card Inspiration

If you want to make cards that mean something to someone, you’ve got to find that spark of inspiration first. Here are a few ideas to get you started:

  • Birthday cards: Use bright colors and festive embellishments to celebrate the special occasion. Add personalized messages and photos to make the card even more memorable. 
  • Thank you cards: Let your gratitude shine with elegant designs and heartfelt inscriptions. Consider using calligraphy or hand lettering to add a personal touch. 
  • Holiday cards: Showcase seasonal themes and festive holiday colors. Use foil accents and glitter to add sparkle and shine. 

For more DIY card inspiration for all occasions, check out Wendy Crafts’ on Instagram! 

Tips for Choosing the Best Cardmaking Supplies

As you get ready to dive into the exciting world of cardmaking, here are some pointers to help you set the stage for fun and inspiring paper crafting.

  • Consider your budget and crafting frequency: Be honest about how much time you’ll have for making cards, and then buy accordingly.
  • Start with basic supplies: Start with cardmaking supplies that can be used for multiple projects. Gradually add specialty items as you branch out into new techniques and styles.
  • Invest in quality tools: Quality tools last longer and provide better results. Look for tools with ergonomic designs.
  • Explore different brands: Try new products and brands to find your favorites. Read reviews and compare prices for the best deals.
A woman sitting at a table, working on paper crafts while surrounded by cardmaking supplies for her project.

Unleash Your Creativity

Once you discover how easy it is to create gorgeous handmade cards that make people say “wow,” you’ll never look at store-bought cards the same way again! By using the best cardmaking supplies and playing around with various techniques, you can create stunning cards that recipients will love and treasure.

Ready to start crafting? Visit my Wendy Crafts YouTube channel for more tutorials and inspiration. And follow me on Instagram for daily crafting tips and ideas!

What is the Crayon Resist Stamping Technique in Card Making?

How To

Want to add a bit of magic to your handmade cards? The crayon resist stamping technique is a beautiful way to create unique designs that will impress your friends and family. By combining the simplicity of stamping with ink or watercolor paint, you can unlock a world of creative possibilities. 

At Wendy Crafts, I’m passionate about helping you discover the joy of handmade crafting. Whether you’re an expert card maker or someone who is new to crafting, the crayon resist stamping technique is easy to learn and offers endless opportunities for customization.

So grab your supplies, and I’ll walk you through everything you need to know to master this fun and versatile technique!

Handmade card with stamped flowers and an ink wash that shows the crayon resist technique

What is the Crayon Resist Technique?

The crayon resist technique is a simple yet clever art method that relies on the basic principle that oil and water don’t mix. Crayons are made of wax, an oil-based material. When you apply water-based media, like ink or watercolor paint, over the crayon, the wax repels the water, creating a “resist” effect. 

The resist between the oil and water materials leaves behind a beautiful, textured design on the areas where the crayon was applied. 

The beauty of crayon resist art lies in its versatility. Depending on the type of crayons, colors, and application techniques used, you can create effects that range from subtle to “wow!”

Materials for creating the Crayon resist stamping technique: cardstock, ink pads, stamps, foam brushes, white crayon

Materials Needed for Crayon Resist Stamping

Before you can jump into using the crayon resist stamping technique on your homemade card, you need to gather some supplies. You may even have some of these things at home already! Here’s what you’ll need:

  • Cardstock: A sturdy cardstock that can handle water-based media without buckling is best.
  • Crayons: Wax crayons or watercolor crayons work well for this technique. 
  • Stamps: Rubber stamps, clear stamps, and even household items can be used for stamping.
  • Ink Pads: Any stamping ink pads will work, but permanent ink is less likely to smudge.
  • Watercolors, Inks, or Dyes: Choose your preferred water-based media for adding color to your stamped image.
  • Brushes and Sponges: Soft brushes and art sponges are ideal for applying your water-based media.
  • Heat Tool (Optional): A heat tool can speed up the drying process.
  • Other Embellishments (Optional): Add extra flair to your cards with embellishments like glitter, sequins, or die cuts.

Steps for the Crayon Resist Stamping Technique

Now that you have your crayon resist card supplies ready, you can get started! Follow this step-by-step crayon resist stamping tutorial to make your own crayon resist stamped cards:

  1. Prepare your cardstock: Cut your cardstock to the desired size and fold it in half to create your card base (you can also add some watercolor or ink in this stage for the background).
  2. Stamp the image: Press the inked stamp firmly onto the cardstock, ensuring good contact to transfer the design. 
  3. Apply crayon to cardstock: Experiment with different crayon application techniques, like coloring in a solid block, creating patterns, or using a light touch for a subtle effect.
  4. Apply watercolor, ink, or dye: Use a sponge or brush to lightly apply and rub in your water-based media, make sure you go over the crayon areas. 
  5. Allow to dry: Let your card air dry completely, or you can speed up the process by using a heat tool like a hair dryer.
  6. Add optional embellishments: Once the card is dry, enhance it with embellishments like glitter, sequins, or die cuts to add extra dimension and personality.
Detail of white crayon design resisting lavender colored ink

Tips and Tricks for the Best Results

It can take a few practice runs to master the crayon resist stamping technique. So, here are some tips to help you get clean and vibrant results:

  • Apply crayon evenly: For a smooth resist effect, be sure the crayon is applied evenly to the cardstock. You might need to draw on multiple layers to make thick lines.
  • Control water for watercolors: Use minimal water and lightly apply watercolor to avoid oversaturating the paper and bleeding into the crayon areas. You should also use minimal water.
  • Experiment with color combinations: For colorful, eye-catching results, try combining cool (purples, blues, and greens) or warm (reds, oranges, and yellows) colors.
  • Unique backgrounds with crayon resist spray bottle painting: Create interesting backgrounds by spraying diluted watercolor over crayon drawings or patterns using a spray bottle. This will give your card a splatter effect.
  • Use white crayon for highlights: If you want bright highlights, use a white crayon. It works on both light and dark cardstock, but it’s a little difficult to see what you’re drawing on white cardstock.
  • Scratch the crayon off if needed: If you use white crayon, sometimes the water-based media will sit on top of it. After the media dries, you’ll simply need to scratch the crayon wax off to reveal your design.
  • Clean your stamps thoroughly: Crayon residue can build up on your stamps, especially if you’re layering. Clean your stamps with a stamp cleaner or even a damp paper towel. 
Flower design ink stamps

Ideas for Crayon Resist Cards

The crayon resist stamping technique opens up a world of creative possibilities for card making. One way to explore this technique is to create beautiful backgrounds with simple crayon shapes. For a whimsical effect, use stripes, dots, or swirls. 

You can create original cards for specific occasions, such as birthdays or holidays, using stamps and colors that match the theme. For example, you could create a birthday card with brightly colored balloons or a Christmas card with festive red and green trees.

Embellishments and Mixed Media

Don’t be afraid to combine crayon resist with other card-making techniques. Pair it with embossing, die-cutting, or stenciling for added depth and dimension. Layering these techniques creates unique and intricate designs. 

It’s also helpful to look for inspiration online or in card-making magazines to discover different ways to use the crayon resist technique. You’ll find endless possibilities, from simple cards to elaborate mixed-media crafts.

Can I Use This Technique in Art?

Crayon resist isn’t limited to card making! You can use this technique for general crayon resist paintings. Just use smooth, thick paper, like bristol board or even watercolor paper, so it doesn’t get soggy when the crayon and watercolor resist. Watercolor paints can oversaturate thin paper and cause it to rip easily.

Finished card with the crayon resist stamping technique shown

Ready to Try Crayon Resist Stamping?

The crayon resist stamping technique is a great way to add a simple yet personal touch to your handmade cards. It’s a versatile technique that’s easy to learn and opens the door to new forms of creativity. Start creating your own stunning crayon resist cards today!

If you used this tutorial, I’d love to see your creations! Share your crayon resist cards with me on social media using the hashtag #WendyCrafts, and be sure to check out my other blog posts for more crafting inspiration and tutorials.

How to Make a Hand-Embroidered Card: A Step-by-Step Tutorial

How To

There’s something special about knowing someone took the time to create something just for you! Hand-embroidered cards offer a personal touch and sentimental value missing from most store-bought cards. Whether you’re a complete beginner or have embroidery experience, you can make embroidered cards people will love receiving. 

At Wendy Crafts, I’m passionate about helping you explore your creativity and discover the joy of handmade crafts. Adding a touch of hand embroidery to a card creates a unique and heartfelt gift that’s sure to be treasured.

Let’s get crafting!

Materials for hand-embroidered cards, including cardstock, embroidery floss, needle, and small scissors

Materials Needed

Before you get to the actual card-making, you’ll need to gather basic tools and materials for making beautiful hand-embroidered cards.

  • Embroidery Floss/String: This is your paint! DMC and Anchor are popular brands that offer an extensive range of colors in various types, such as cotton, silk, and metallic. Each type has a unique texture and sheen, so feel free to experiment and find your favorites.
  • Embroidery Needles: Select needles with a sharp point for easily piercing card stock. Sizes 7 and 9 are commonly used for embroidery, but you can adjust depending on your thread and fabric.
  • Card Stock or Blank Greeting Cards: Choose sturdy card stock to prevent warping or tearing. For added interest, consider textured options like linen or felt, or use pre-folded cards for convenience.
  • Scissors: Sharp embroidery scissors are ideal for snipping threads cleanly and preventing fraying.
  • Pencil or Water-Soluble Pen: Use these to trace your design lightly before inserting your embroidery needle and string.
  • Optional Tools & Materials: Tracing paper, a ruler, a lightbox, and embellishments (beads, sequins, etc.) to add sparkle and dimension to your cards.

The items on this list can be found at local craft stores, such as Michaels and Joann Fabrics, online retailers like Amazon and Etsy, or specialty embroidery shops.

Design sketched in pencil on cardstock for embroidered card

Choosing Your Design for Embroidered Cards

The beauty of hand-embroidered cards lies in the endless design possibilities. From birthdays to Valentine’s Day to “just because,” you can’t go wrong with a handmade card! 

Here are some ideas to inspire your embroidered card project:

  • Simple Patterns for Beginners: Start with simple and charming designs, such as hearts, flowers, stars, and basic lettering, which are easy to master and build confidence.
  • Intricate Designs for Experienced Embroiderers: Explore more complex floral patterns, animals, or miniature scenic landscapes—challenge yourself with intricate stitches and thread combinations.
  • Pre-made Hand Embroidered Card Patterns: Many online shops and craft stores offer ready-to-use patterns to save time and provide a starting point for your creations.
  • Create Your Own: Sketch your ideas, draw inspiration from nature, or use online tools to create custom patterns.
  • Online Inspiration: Pinterest, Etsy, and Instagram are treasure troves of embroidered card ideas. Browse through different styles, color palettes, and techniques to spark your creativity.

Remember to choose a design based on the occasion and the recipient’s personality. A bright and whimsical design is great for a birthday card, while a simple, elegant pattern is ideal for a wedding or anniversary card.

Design drawn lightly in pencil on beige cardstock

Preparing Your Card for Embroidery

Once you have your materials and design image, it’s time to prepare your card for embroidery. There are a couple of easy ways to put the design image on your card.

If you have a steady hand and are making a simple design, you can lightly trace the design directly onto the card using a pencil or water-soluble pen. 

If you prefer a cleaner transfer or the design is intricate, trace the pattern onto tracing paper. Then, use a lightbox to illuminate the design from below. This will allow you to see the lines through the card stock and trace them accurately.

If you have a printer that can handle card stock, you can print your design directly onto the card. Check that your printer settings are adjusted for thicker paper to avoid jams or smudging!

Tips for Placing Your Design:

  • If you’re using a water-soluble pen, test it on a scrap piece of paper first to make sure the ink comes off cleanly.
  • Center your design carefully using a ruler as a guide.
  • Use light pressure when tracing to avoid leaving deep indentations on the card.

Basic Embroidery Stitches for Cards

Don’t worry if you don’t know how to do fancy embroidery—even simple stitches can make your handmade cards shine! I’ll show you a few easy ones that are perfect for adding a touch of handmade love to your cards.

Demonstration of backstitch in red floss on beige cardstock

Backstitch

This versatile stitch creates a solid line, ideal for outlines, lettering, and stems. To backstitch, do the following:

  1. Bring the needle up through the card at your starting point (point A). 
  2. Take a small stitch backward (point B), inserting the needle back down. 
  3. Then, you’ll bring the needle up a stitch length ahead (point C). 
  4. Insert the needle back down at point B and bring it up a stitch length ahead of C (point D).
  5. Continue the same stitching process to create a continuous line on your card.
Demonstration of satin stitch in red floss on beige cardstock

Satin Stitch

Use this stitch to fill areas with solid color, creating a smooth, satin-like finish. To use the satin stitch in your design, follow these simple steps:

  1. Bring the needle up on one side of the shape (point A) and down on the other (point B).
  2. Keep the stitches close together and parallel. 
  3. Repeat this process, ensuring the threads lie flat and smooth for a polished look.
Demonstration of French knots in red floss on beige cardstock

French Knots 

These small, textured knots add dimension and interest to your embroidered cards. Don’t be intimidated by their exotic-sounding name—they’re easy to get the hang of!

  1. Bring the needle up through the card (point A). 
  2. Wrap the floss around the needle twice, holding it tightly with your non-dominant hand. 
  3. Insert the needle very close to where it emerged (point B). 
  4. Pull the needle through while maintaining tension on the floss to create the knot.

Remember that practice makes perfect! It can take some time to get the stitch to look right. Before stitching on your card, it helps to practice your stitches on a scrap piece of fabric or card stock to get comfortable with the technique and achieve consistent results.

Beginning of embroidery on a card

Embroidering Your Card

Now you’re ready to bring your design to life! Here are some tips to get the best results for your hand-embroidered card:

  • Secure Your Thread: Start by knotting the end of your embroidery floss. 
  • Poke the Stitching Holes Ahead of Time: It helps to poke your stitching holes into your design before bringing the thread into play. This will make it easier to thread instead of making the holes as you go.
  • Working with Colors: If your design involves multiple colors, consider how you end and start new threads. Weave the ends through the back of your stitches to secure them and avoid loose ends.
  • Consistent Tension: Maintain an even tension while stitching to avoid puckering or distorting the card. You’re aiming for a gentle, consistent pull on the thread.
  • Tangles: If your thread gets tangled, gently untangle it with your fingers or a needle. 
  • Size and Spacing: Try to keep your stitches the same size and spacing, but don’t be afraid to remove and redo them if necessary!
Inscription on the inside of a hand-embroidered card

Finishing Touches for Your Embroidered Cards

Once you’ve completed the embroidery, it’s time to add those special finishing touches. Think pretty embellishments, maybe a fancy frame, and don’t forget a heartfelt message inside. These will make your card extra special!

  • Embellishments: Add beads, sequins, ribbons, or other decorative elements to enhance your design. Sew them securely with a needle and thread, or use a strong adhesive.
  • Framing or Mounting: For a more polished and professional look, you can frame your embroidered card or mount it on a larger piece of card stock. Choose a frame or mat that complements your design and color scheme.
  • Heartfelt Message: Don’t forget the most important part of your card—writing a thoughtful message inside. 
A finished hand-embroidered card with heart-shaped balloons and a LOTS OF LOVE inscription

Ready to Create Your Own Embroidered Cards?

Get ready for a seriously fun and rewarding crafting adventure! Making embroidered cards is the perfect way to unleash your creativity and create one-of-a-kind gifts that will be treasured forever.

Don’t be afraid to experiment and have fun with card embroidery! The time and care you put into each stitch will shine through, making your cards truly special keepsakes.

Looking for more ideas? Check out my other blog posts for more handmade crafting inspiration!